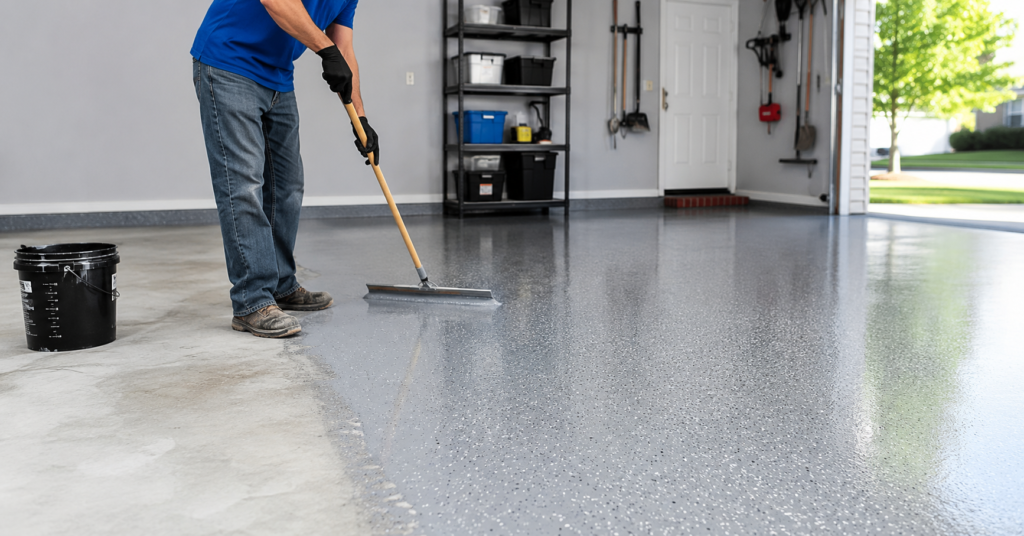

If you have ever wondered how to epoxy garage floor surfaces to achieve a clean, durable, and professional-looking finish, you’re not alone. Epoxy flooring has become one of the most popular choices for homeowners because it transforms ordinary concrete into a smooth, stain-resistant, and attractive surface. Whether you use your garage as a workshop, storage area, or parking space, applying epoxy can significantly improve both its appearance and longevity.
A properly installed epoxy floor can last for many years with minimal maintenance. However, the key to success lies in careful preparation, choosing quality materials, and following the correct application process. This guide explains everything you need to know in a simple, practical way so you can achieve impressive results without unnecessary complications.
Why Choose an Epoxy Garage Floor?
Epoxy flooring is much more than a decorative coating. It creates a strong protective layer that bonds tightly with concrete, helping the floor resist wear and tear from daily use.
Many homeowners choose epoxy because it withstands heavy vehicles, dropped tools, oil spills, moisture, and chemicals better than untreated concrete. It also creates a brighter garage by reflecting light, making the space feel larger and cleaner.
Another major advantage is maintenance. Dust, dirt, and spills are much easier to clean from an epoxy-coated floor than from bare concrete, making regular upkeep quick and effortless.
Understanding Epoxy Flooring
Before learning how to epoxy garage floor projects successfully, it’s important to understand what epoxy actually is.
Epoxy flooring consists of two components: resin and hardener. When mixed together, these ingredients create a chemical reaction that forms an exceptionally strong surface. Unlike ordinary paint, epoxy doesn’t simply sit on top of the concrete. Instead, it bonds with the surface, creating a durable finish designed to last.
Professional-grade epoxy typically performs better than inexpensive one-part coatings, offering greater durability and resistance to damage.
Preparing the Garage Floor
Preparation is the single most important step in the entire process. Even the highest-quality epoxy will fail if applied over a dirty or damaged surface.
Begin by removing everything from the garage. Sweep away loose dirt and debris before using a concrete cleaner to eliminate grease, oil, and stains. Any contaminants left behind can prevent proper adhesion.
Inspect the floor carefully for cracks, holes, or chipped areas. These imperfections should be repaired with a concrete patching compound and allowed to cure completely before moving forward.
Finally, test the concrete for moisture. Excess moisture trapped beneath the epoxy can cause peeling or bubbling over time. Ensuring the floor is completely dry greatly improves long-term performance.
Choosing the Right Epoxy Kit
Not every epoxy product offers the same level of quality. Selecting the right kit depends on your garage’s size, intended use, and desired appearance.
Water-based epoxy is generally easier to apply and has lower odor, making it suitable for light residential use. Solvent-based products provide increased durability but require better ventilation during application.
Solid epoxy systems deliver the highest level of protection and are often used in commercial garages because they withstand heavy traffic and constant use.
Many homeowners also choose decorative flakes or metallic pigments to create a more customized finish while adding texture that improves slip resistance.
Essential Tools You’ll Need
Gathering all necessary tools before starting helps the project move smoothly without interruptions.
Common tools include paint rollers with extension poles, mixing buckets, measuring containers, paint brushes for edges, protective gloves, safety glasses, concrete cleaner, crack filler, painter’s tape, and spiked shoes for walking on wet epoxy.
Having every tool ready before mixing the epoxy is especially important because the working time after mixing is limited.
How to Epoxy Garage Floor Correctly
Now comes the most important part of the project: understanding how to epoxy garage floor surfaces properly from start to finish.
Begin by carefully mixing the resin and hardener according to the manufacturer’s instructions. Mixing ratios must be accurate because improper proportions can prevent the epoxy from curing correctly.
Start at the farthest corner of the garage and work toward the exit. Use a brush to coat edges and corners before rolling epoxy across larger sections using smooth, overlapping strokes.
Work in manageable sections rather than attempting to cover the entire garage at once. This helps maintain an even finish while preventing visible roller marks.
If you’re adding decorative color flakes, sprinkle them evenly while the epoxy remains wet. Once the coating cures, remove any loose flakes before applying a protective clear topcoat if included in your system.
Patience during application results in a more attractive and durable finish.
Drying and Curing Time
Many people confuse drying with curing, but they are different stages.
The floor may become dry enough to walk on within twenty-four hours, depending on temperature and humidity. However, full curing usually takes several days.
Most manufacturers recommend waiting at least seventy-two hours before parking vehicles on the surface. Heavy equipment or constant traffic should be avoided until the coating reaches its maximum strength.
Allowing sufficient curing time greatly extends the lifespan of your new garage floor.
Common Mistakes to Avoid
Even experienced DIY enthusiasts can make mistakes that reduce the quality of the finished floor.
Applying epoxy to dirty concrete is one of the most common problems. Dust, grease, or moisture prevent proper bonding and often cause peeling.
Another mistake is ignoring temperature recommendations. Epoxy cures best within the temperature range specified by the manufacturer. Conditions that are too hot or too cold may affect curing.
Mixing too much epoxy at once can also create problems because the material begins hardening immediately after mixing. Preparing smaller batches reduces waste and provides better control.
Skipping crack repairs is another issue that can leave visible imperfections beneath the finished coating.
Avoiding these simple mistakes significantly improves the final appearance and durability.
Maintaining an Epoxy Garage Floor
After learning how to epoxy garage floor installations work, proper maintenance helps protect your investment for many years.
Sweep the floor regularly to remove dirt and grit that may scratch the surface over time. Wash occasionally with warm water and a mild cleaner to remove stains and maintain its shine.
Avoid using harsh acidic chemicals unless recommended by the coating manufacturer. Clean oil or chemical spills promptly to preserve the floor’s appearance.
Place protective pads beneath heavy equipment or metal furniture to reduce unnecessary wear.
With simple maintenance habits, many epoxy floors continue looking excellent for ten years or more.
Is DIY or Professional Installation Better?
Many homeowners successfully install epoxy floors themselves, especially when working with high-quality residential kits.
DIY installation can save money while providing a rewarding home improvement experience. However, professional installers often use industrial-grade products and specialized equipment that may produce an even more durable finish.
Large garages, severely damaged concrete, or commercial spaces may benefit from professional installation. Smaller residential garages are often well suited for careful DIY application.
Choosing between the two depends on your budget, confidence, available time, and desired finish.
Benefits That Make Epoxy Worth It
Epoxy flooring continues growing in popularity because it combines beauty with practicality.
It increases resistance to stains, impacts, chemicals, moisture, and tire marks while creating a brighter workspace. The smooth surface makes cleaning faster, and decorative options allow homeowners to personalize their garage.
Compared to replacing damaged concrete, applying epoxy is often a more affordable solution that delivers long-lasting value.
When installed correctly, an epoxy garage floor can dramatically improve both the function and appearance of your home.
Frequently Asked Questions
Can I apply epoxy over old concrete?
Yes. Older concrete can be coated successfully as long as it is structurally sound, thoroughly cleaned, repaired, and completely dry before application.
How long does an epoxy garage floor last?
A properly installed epoxy floor typically lasts between ten and twenty years, depending on traffic, maintenance, and product quality.
Can epoxy be applied during winter?
Yes, but only if the garage temperature meets the manufacturer’s recommended application range throughout the curing process.
Is epoxy slippery?
A glossy epoxy floor can become slippery when wet. Adding anti-slip additives or decorative flakes improves traction without affecting durability.
Can damaged epoxy be repaired?
Minor scratches or chips can usually be repaired by lightly sanding the affected area and applying a fresh coat of compatible epoxy.
Conclusion
Learning how to epoxy garage floor projects are completed properly can help you transform an ordinary garage into a cleaner, stronger, and more attractive space. Success depends largely on careful preparation, choosing quality materials, following the correct application steps, and allowing adequate curing time. While the process requires patience, the long-term benefits make the effort worthwhile. A professionally finished epoxy floor not only enhances the appearance of your garage but also protects the concrete from everyday wear, making it a valuable improvement that you can enjoy for many years.